

Hello everyone!
I hope February has provided you with ample time to craft and create.
I am very excited for this month as I am participating in #TheGreatYarnChallenge hosted by The Craft Yarn Council. (If you’re new to crochet, this is a great place to find all kinds of useful information about yarn, tools, patterns and designing.) There are 6 weeks in the competition and each week is a different theme. Entrants are encouraged to design their own projects; however, you can also use the sample patterns provided and add your own flair. You can enter as many weeks as you would like. This is a good opportunity for me to grow as it will challenge me to get more comfortable with designing—something I’ve wanted to do. And speaking of designing, I’m very proud of the design I created for the first week’s theme, Spruce Up Your Space.
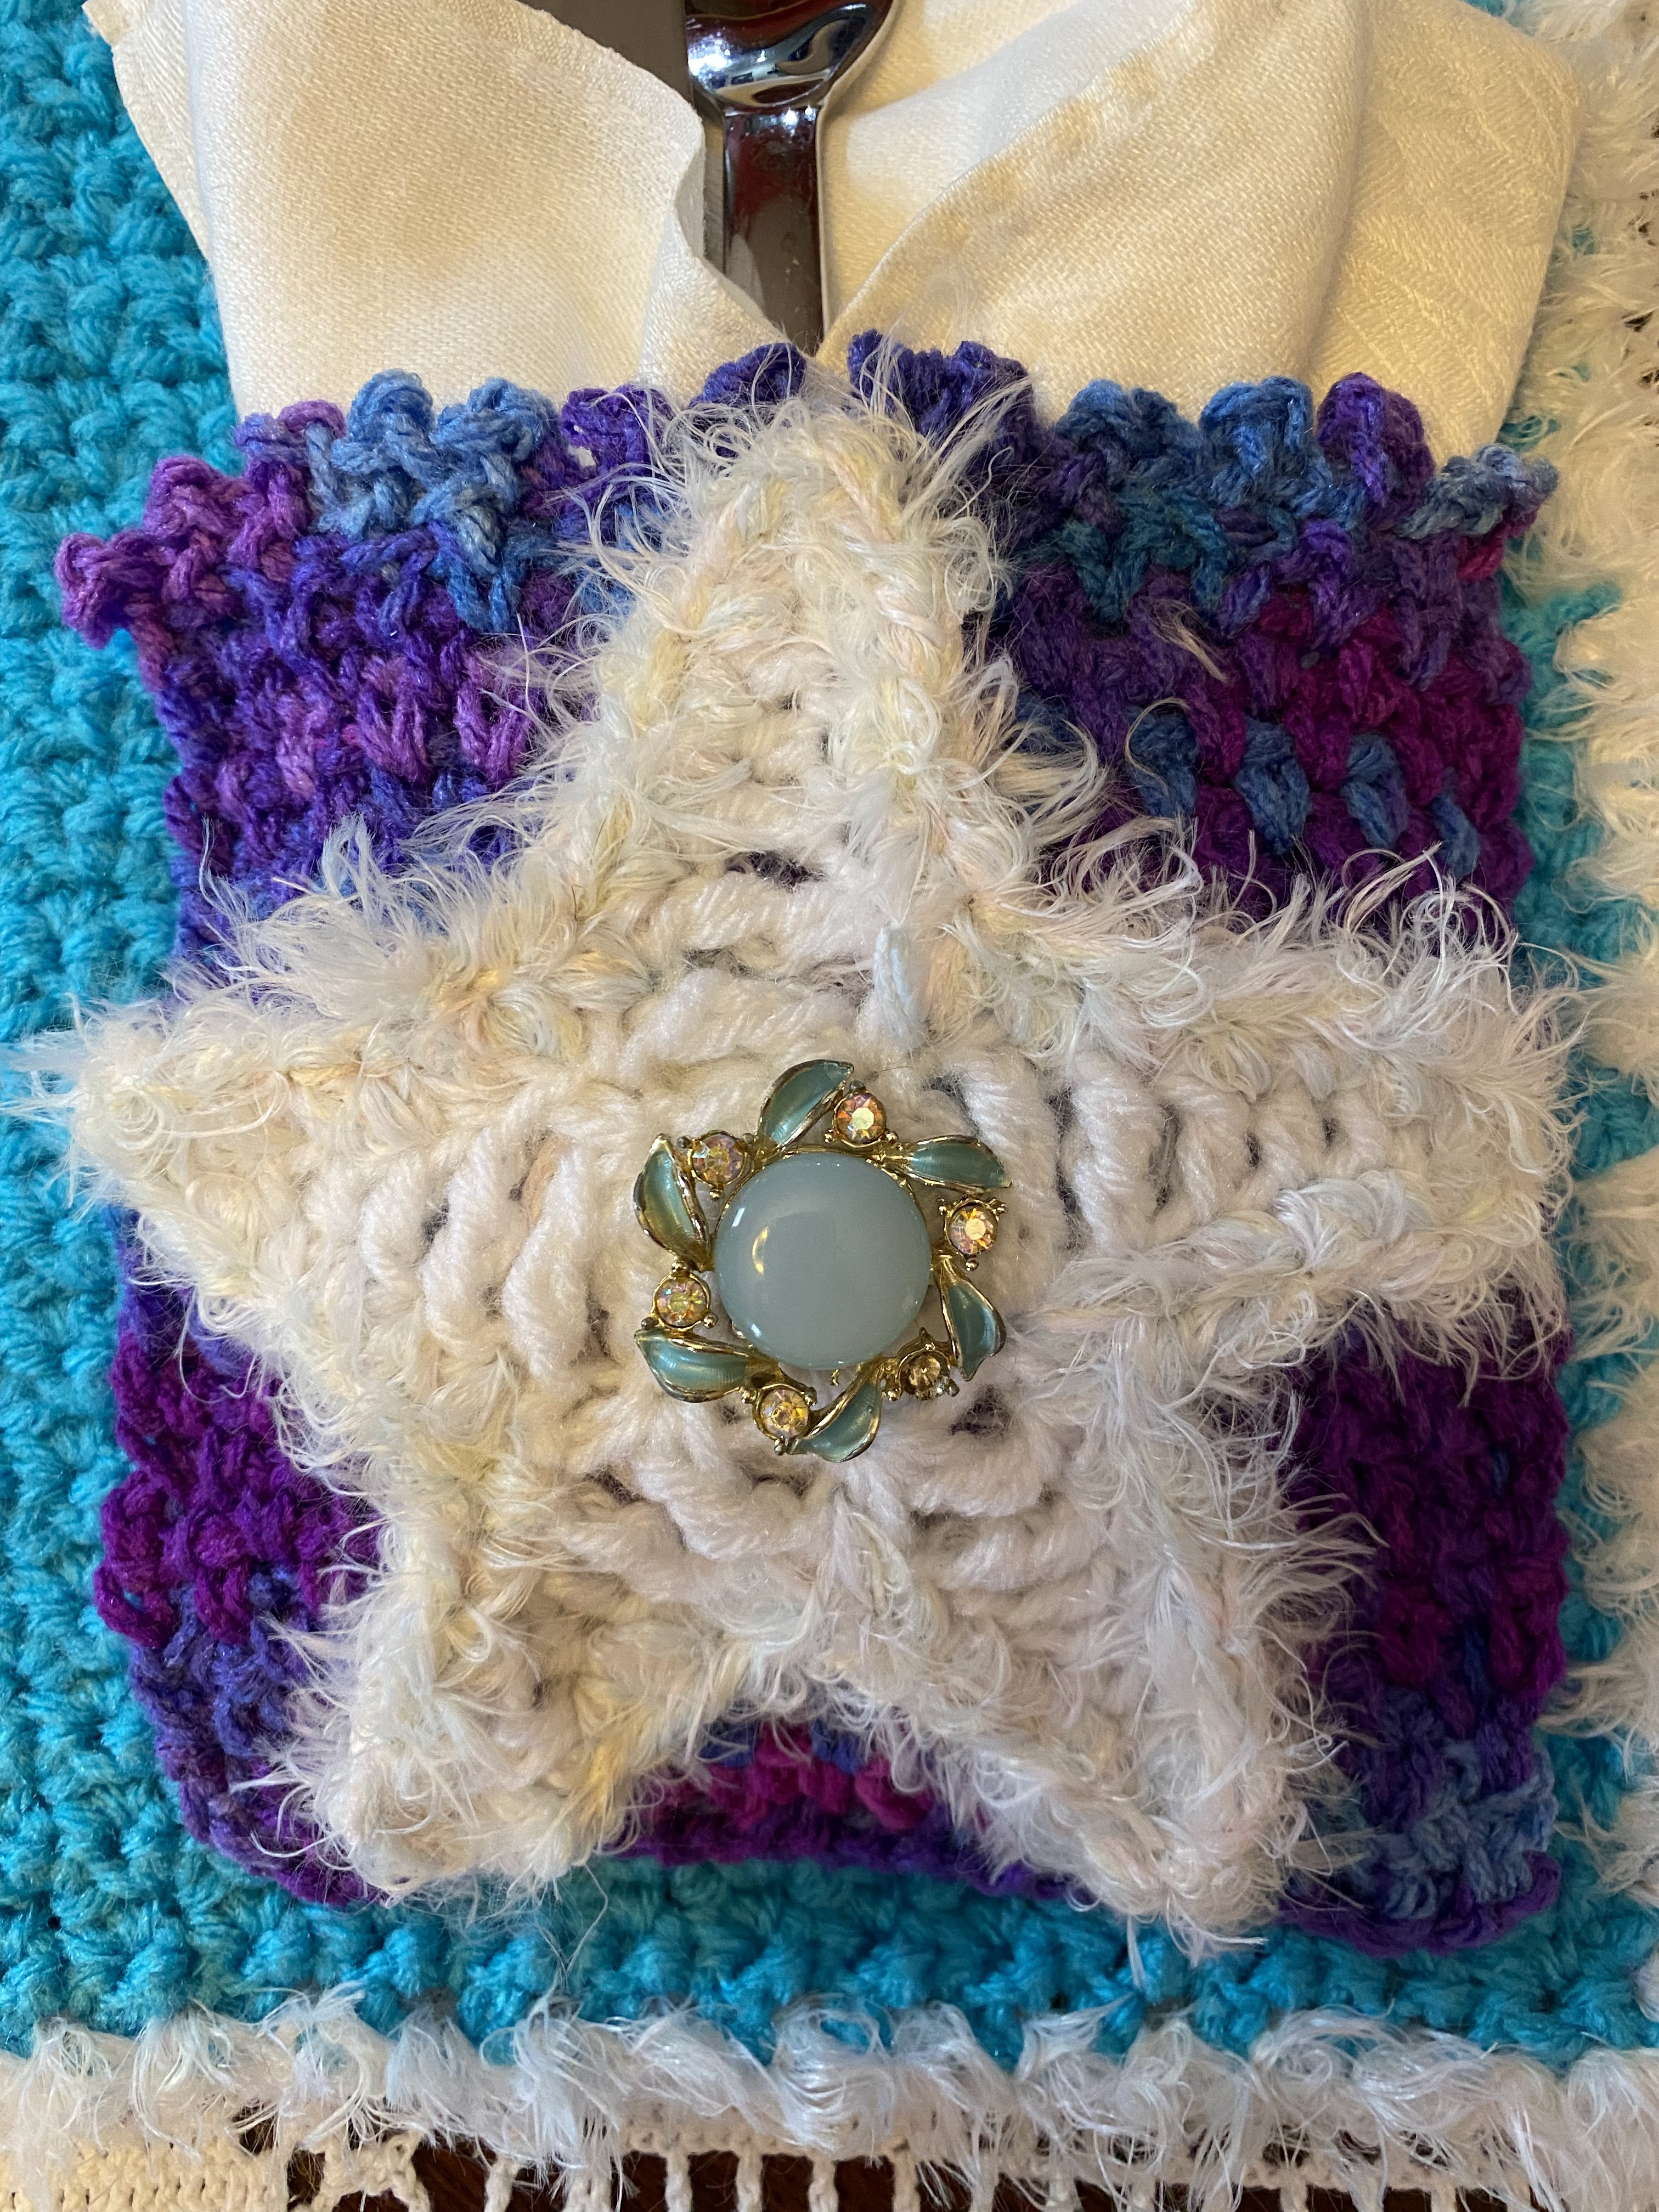
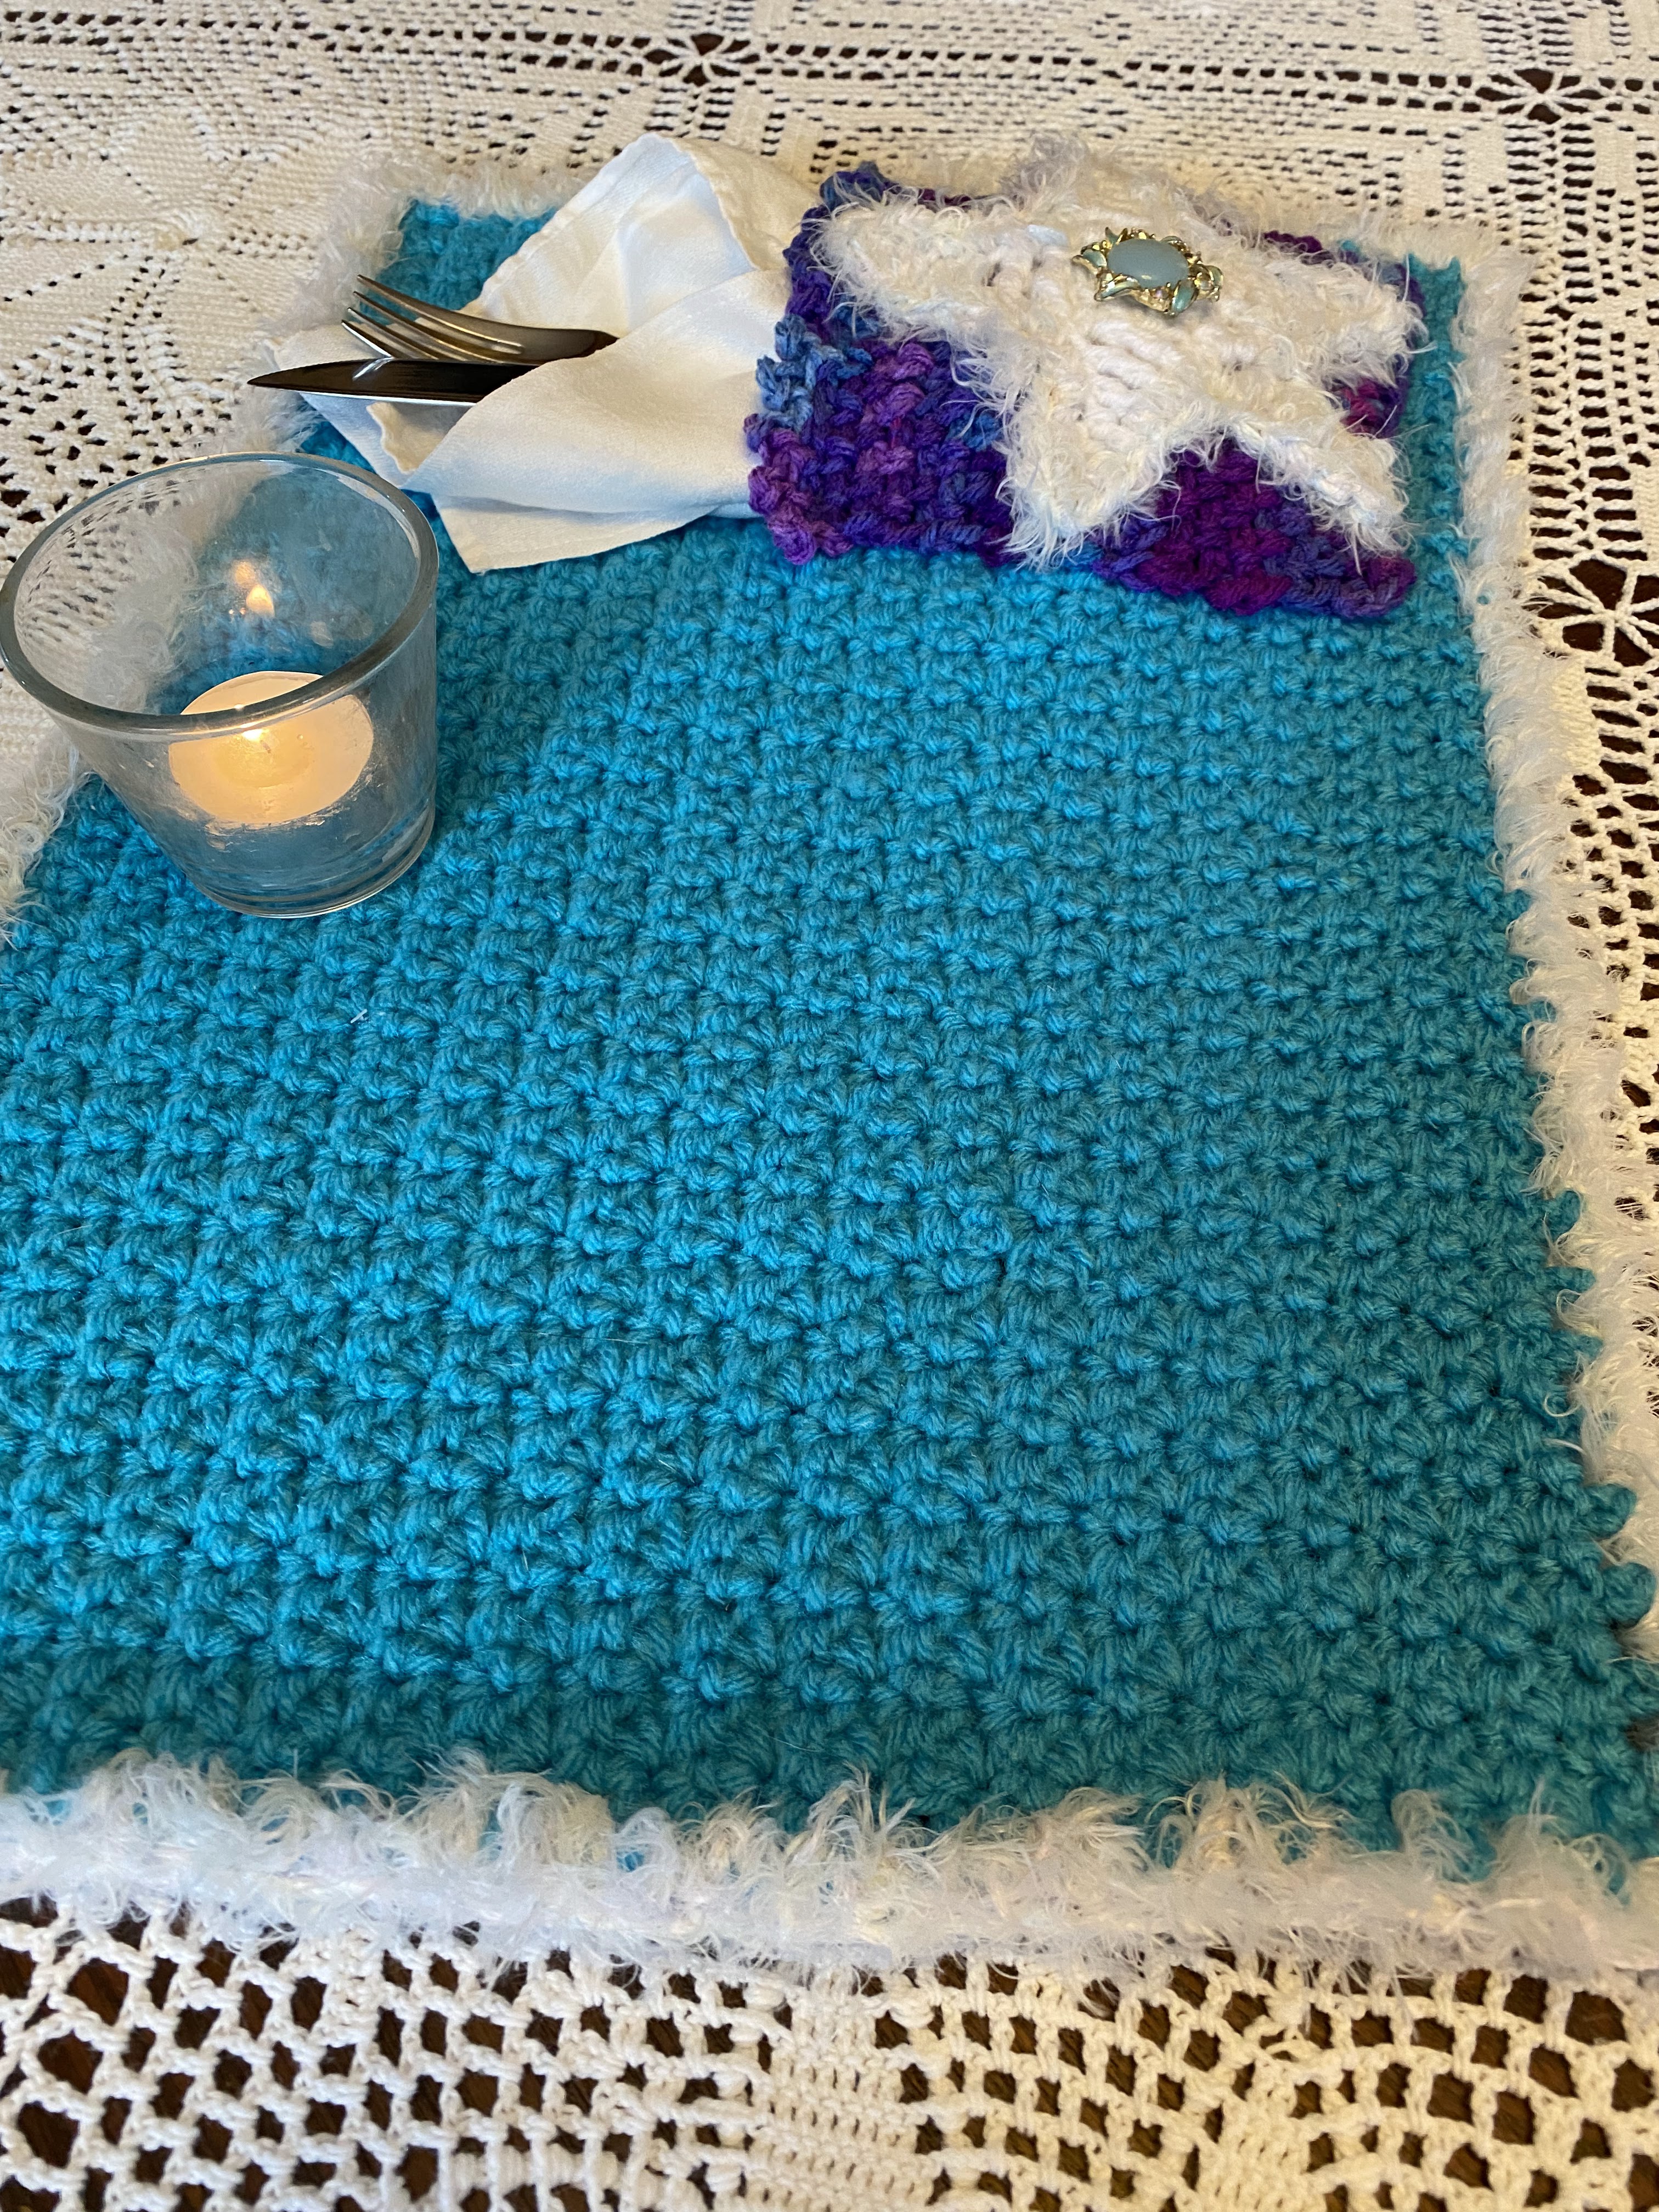
I named this pattern Sparkling Winter Star Placemat. I’m so happy with how it turned out! Every time I walk by it, I smile–I love the colors and I am reminded of its spiritual meaning.
I wanted to create a winter themed household item which expressed pride in my lineage and values as a Native American woman. I was inspired by a YouTube video, “We Come from the Stars” created by Dakota Sioux artist Marlena Myles, for We Are Water MN. The storytelling is by Astronomer, Jim Rock, who explains our beliefs in the connections we have with sky and earth.
We believe we come from the stars and the earth. Once we walk on (pass away) we will return to the earth and our spirit will travel the Milky Way home to our relatives, if we have lived a good life.
If you’ve read this far, thank you! But maybe, you are here for the free pattern? Nothing wrong with that! Everyone loves a freebie. I understand. I will warn you though, I haven’t had anyone test this yet. I just completed it last week. If you have any questions, you are welcome to email me at crochetatthelodge@gmail.com.
Pattern for Sparkling Winter Star Placemat
Materials needed:
- 4.5 crochet hook for placemat and napkin/utensil pocket
- 3.5 crochet hook for border of placemat and star
- Body of placemat–1 skein, Aran weight (4) yarn—I used Red Heart Super Saver, Turqua
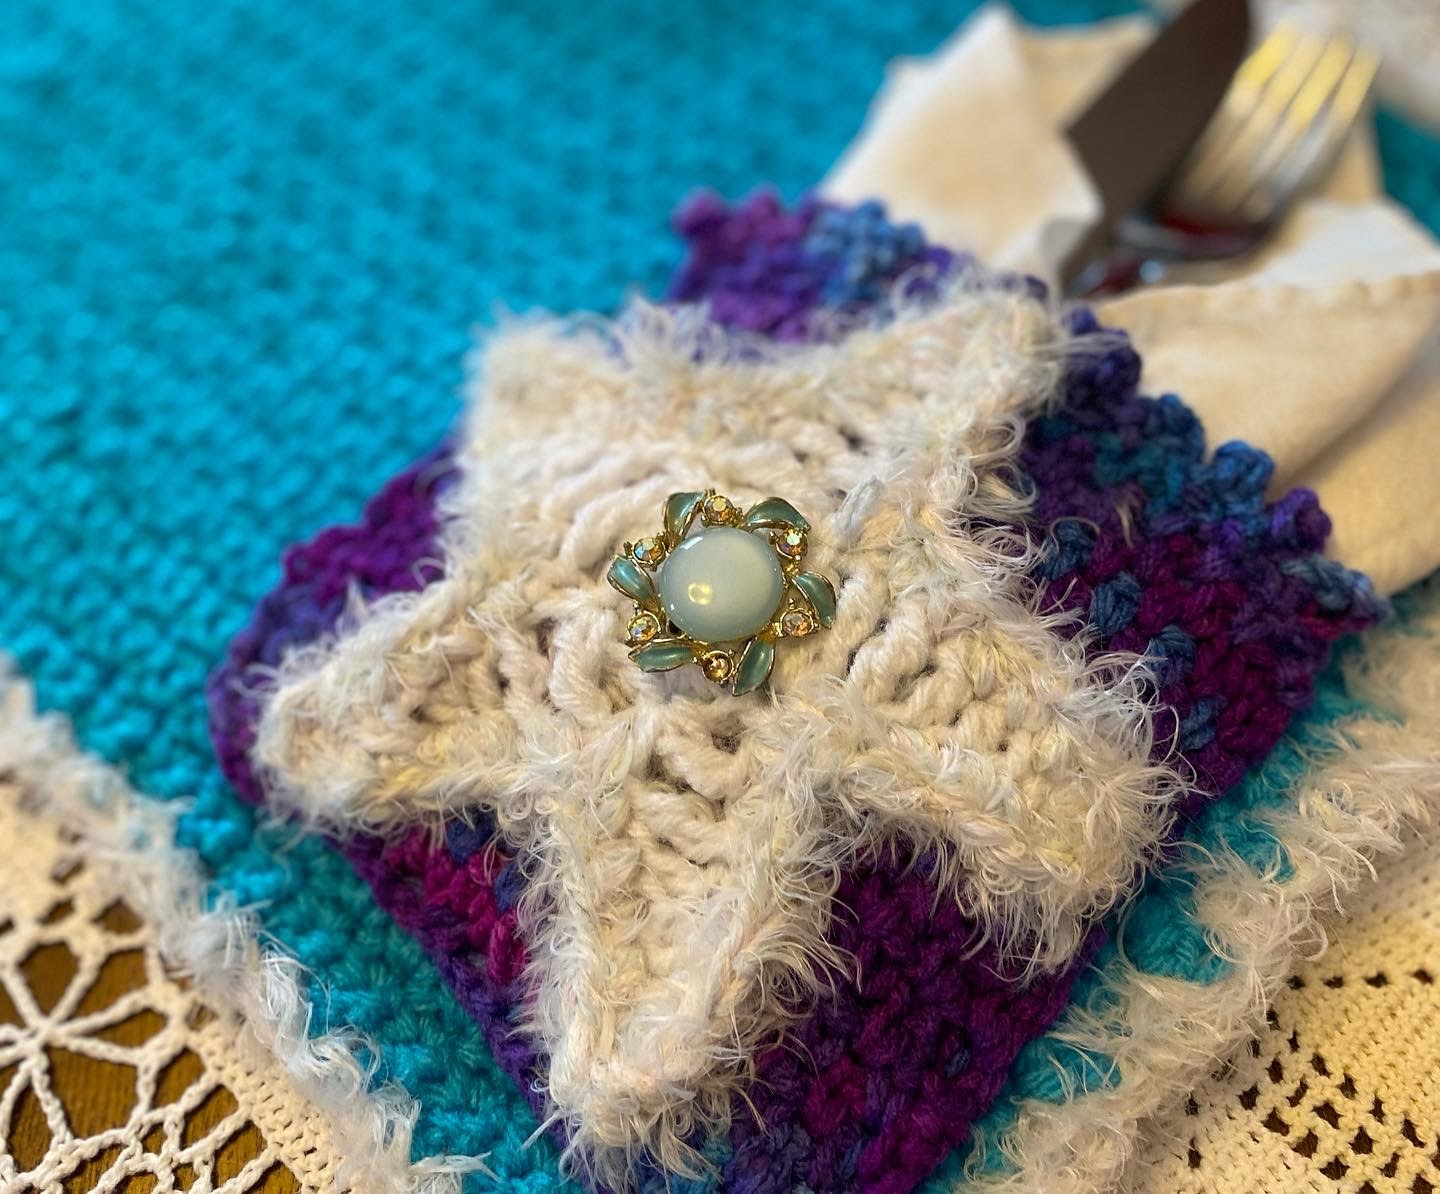
- Napkin/utensil pocket–small amount of Aran weight (4) yarn—I used Red Heart Super Saver, Grape Fizz
- Star—small amount of Aran weight (4) yarn—I used Red Heart Super Saver, White
- Border of placemat and star—I used a small amount of Lion Brand Tiffany, held triple, which unfortunately is discontinued. If you use a substitute, experiment with the number of yarns you’re holding. Lion Brand classifies this yarn as a sport weight or 3–which doesn’t seem quite accurate to me. If you hold a different sport weight yarn triple, it might be too bulky! I looked at YarnSub.com and they recommended the following: Trendsetter Yarns, Aura or King Cole, Moments. The Lion Brand Yarn website recommends using any nylon yarn with a weight of 3 or sport weight.
- Star embellishment—Whatever you like! I used an old earring I found in a vintage shop. You could also use buttons. It looks just fine plain as well.
Abbreviations (US terms)
- Ch—chain
- DC—double crochet
- FO—finish off
- HDC—half double crochet
- RS—right side
- SC—single crochet
- Sk—skip
- Sl St—slip stitch
- Tr—triple crochet
Placemat, worked in Alternate Stitch (multiple of 2 ch plus 2)
- Chain 72 or whatever number of chains provides the width you desire. (Excluding the border, my placemat measures 14.5”.)
- Row 1—sk 3 ch, 2 sc in next ch, *sk 1 ch, 2 sc in next ch*, repeat from * to the end of row. At end, ch 2 and turn.
- Row 2–*sk first st, 2 sc in next st*, repeat from * until the end of the row. At end, ch 2 and turn.
- Repeat row 2 until the placemat is the height you like. (Mine measures 11” and is 41 rows.) FO
Placemat border
SC in stitches on the bottom and top of placemat and in the ends of the rows on the sides. For the corners, work 3 sc.
Napkin/Utensil Pocket, worked in Woven Stitch (multiple of 3 ch plus 3)
- Chain 25 or whatever number of chains provides the width you desire. (My pocket measures 5.5″)
- Row 1—sk 2 ch, 1 sc, *ch 1, sk 1 ch, 1 sc*, repeat from * until end of row. At end, ch 2 and turn.
- Row 2—*1 sc in ch sp of previous row, ch 1*, repeat from * until turning ch. 1 sc in the turning ch sp. ch 2, turn.
- Repeat row 2 until you reach the height desired. (Excluding the top border, my pocket is 5″ tall.) FO
Pocket Border, worked in the Looped Picot Edging Stitch
- Ensure you are working on the RS of the pocket. (Your beginning yarn tail will be in the right, bottom corner.)
- Top of pocket–Sl st in first st, *ch 4, sl st into first of these ch, sl st into next st, rep from * to end. FO
Star
- Ch 2
- Round 1—5 sc in 2nd ch from hook
- Round 2—3 sc in each sc
- Round 3—(1 sc in next st, ch 6, sl st in 2nd ch from hook, 1 sc in next ch, 1 hdc in next ch, 1 dc in next ch, 1 tr in next ch, 1 tr in base of starting sc, sk 2 sc ) 4 times, sl st in first sc to join, FO.
Star Border
SC in stitches around the edge of the star. FO
Star Embellishment
Attach whatever embellishment you’ve chosen to the center of the star. Be creative and have fun with your choice!
Assemble
- Applique or sew the star to the pocket.
- Sew the pocket to the placemat. I found a wonderful tutorial on how to applique or sew so your stitches do not show on the other side of your placemat on Hooked By Robin.
And you’re finished! One Sparkling Winter Star to adorn your table. I hope you enjoyed this pattern. Again, if you have questions, feel free to email me at crochetatthelodge@gmail.com.
